Navigation can be seen as a step by step process, so I will try to explain it as such.
Step 1: Path-finding
Finding the shortest, or most cost effective path between a series of checkpoints (called nodes) is a fairly simple process. First, a cost value is assigned to each node. This cost is usually representative of the distance or time it takes to travel to the node, however this may not always be the case. If desired, the cost could literally be a monetary value required to travel from node A to node B.
Once the cost of traveling from node to node has been assessed, the A* algorithm can be applied to determine the most cost effective path. This is without a doubt the easiest part of the path finding process. The hard part is selecting our nodes.
When you hear the word node, you may be tempted to think of a single coordinate in space. Most of the time this is not an incorrect assumption, however in a comprehensive 3D game engine, path nodes are usually represented as geometry. These bits of geometry are more commonly referred to as Navigation Meshes (Nav Meshes for short).
Image captured from Reddy Sambavaram's GDC presentation
Nav Meshes are convex 3D polygons which are used to represent the space that NPCs can traverse. In the path-finding algorithm, these are our nodes. Nav meshes can be (and have historically been) generated in different ways. In Resistance 1 and 2, the nav meshes were laid out by level designers in Maya. Eventually this system was overhauled in favor of an automated nav mesh generator in the team's world editor. Insomniac's process of automated nav mesh generation uses voxels (3D volumetric pixels) to approximate the traversable area of the game world. This is done in a step by step process as follows:
Image captured from Reddy Sambavaram's GDC presentation
Once the nav mesh has been generated, and the A* algorithm applied we can move on to:
Step 2: Steering
Steering NPCs in a realistic way is mostly a combination of obstacle avoidance, and spline interpolation. These techniques ensure that enemies do not walk into objects, or move in boring linear paths. For simple navigation around corners, Insomniac uses the "string pull" method to smooth the AI's turning.
Image captured from Reddy Sambavaram's GDC presentation
For more complex sets of obstacles however, this technique is not enough
In scenarios with multiple small obstacles, "escape tangents" are computed for each obstacle. These are simply possible vectors which allow the NPC to avoid contact with the obstacle.
Image captured from Reddy Sambavaram's GDC presentation
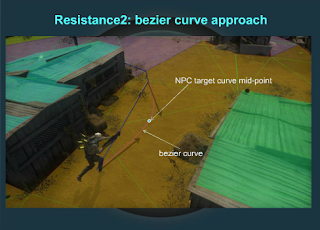
Simply having NPCs move in straight lines while avoiding obstacles is not enough. These escape tangents are used as the basis of bezier curves which will produce a fluid, more realistc path of motion.
Ok, now we have NPC's that can avoid obstacles, and move along a spline. What else is left?
Step 3: Animation
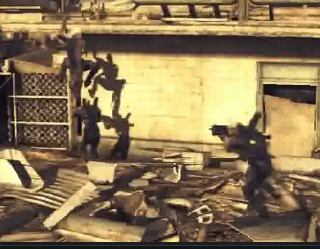
In order for the AI to traverse a dynamic environment in a believable fashion, each NPC must animate differently according to obstacles/interactables in the game world. The most notable example is when the AI must traverse some sort of height difference, whether it be by climbing, jumping up, or jumping down. Insomniac solves this issue by using a system called "custom links". Custom links are like nodes, except they allow the designer to specify what animation the NPC will play upon traversal, and even allow the NPCs to modify the cost of individual nodes (for example if one NPC climbs through a window, the link's cost will increase while he does so). This technology allows for highly dynamic AI that can traverse the level in interesting ways.
These 3 main components when done right, come together to create very believable AI navigation in games. Insomniac does an exemplary job tying these components together, and with very impressive performance to boot. If you'd like to learn more about Insomniac's navigation ingenuity, check out Reddy Sambavaram's original GDC Talk (http://www.insomniacgames.com/navigation-gdc11/).


