Wednesday, 27 November 2013

NPC Navigation: The Insomniac Way

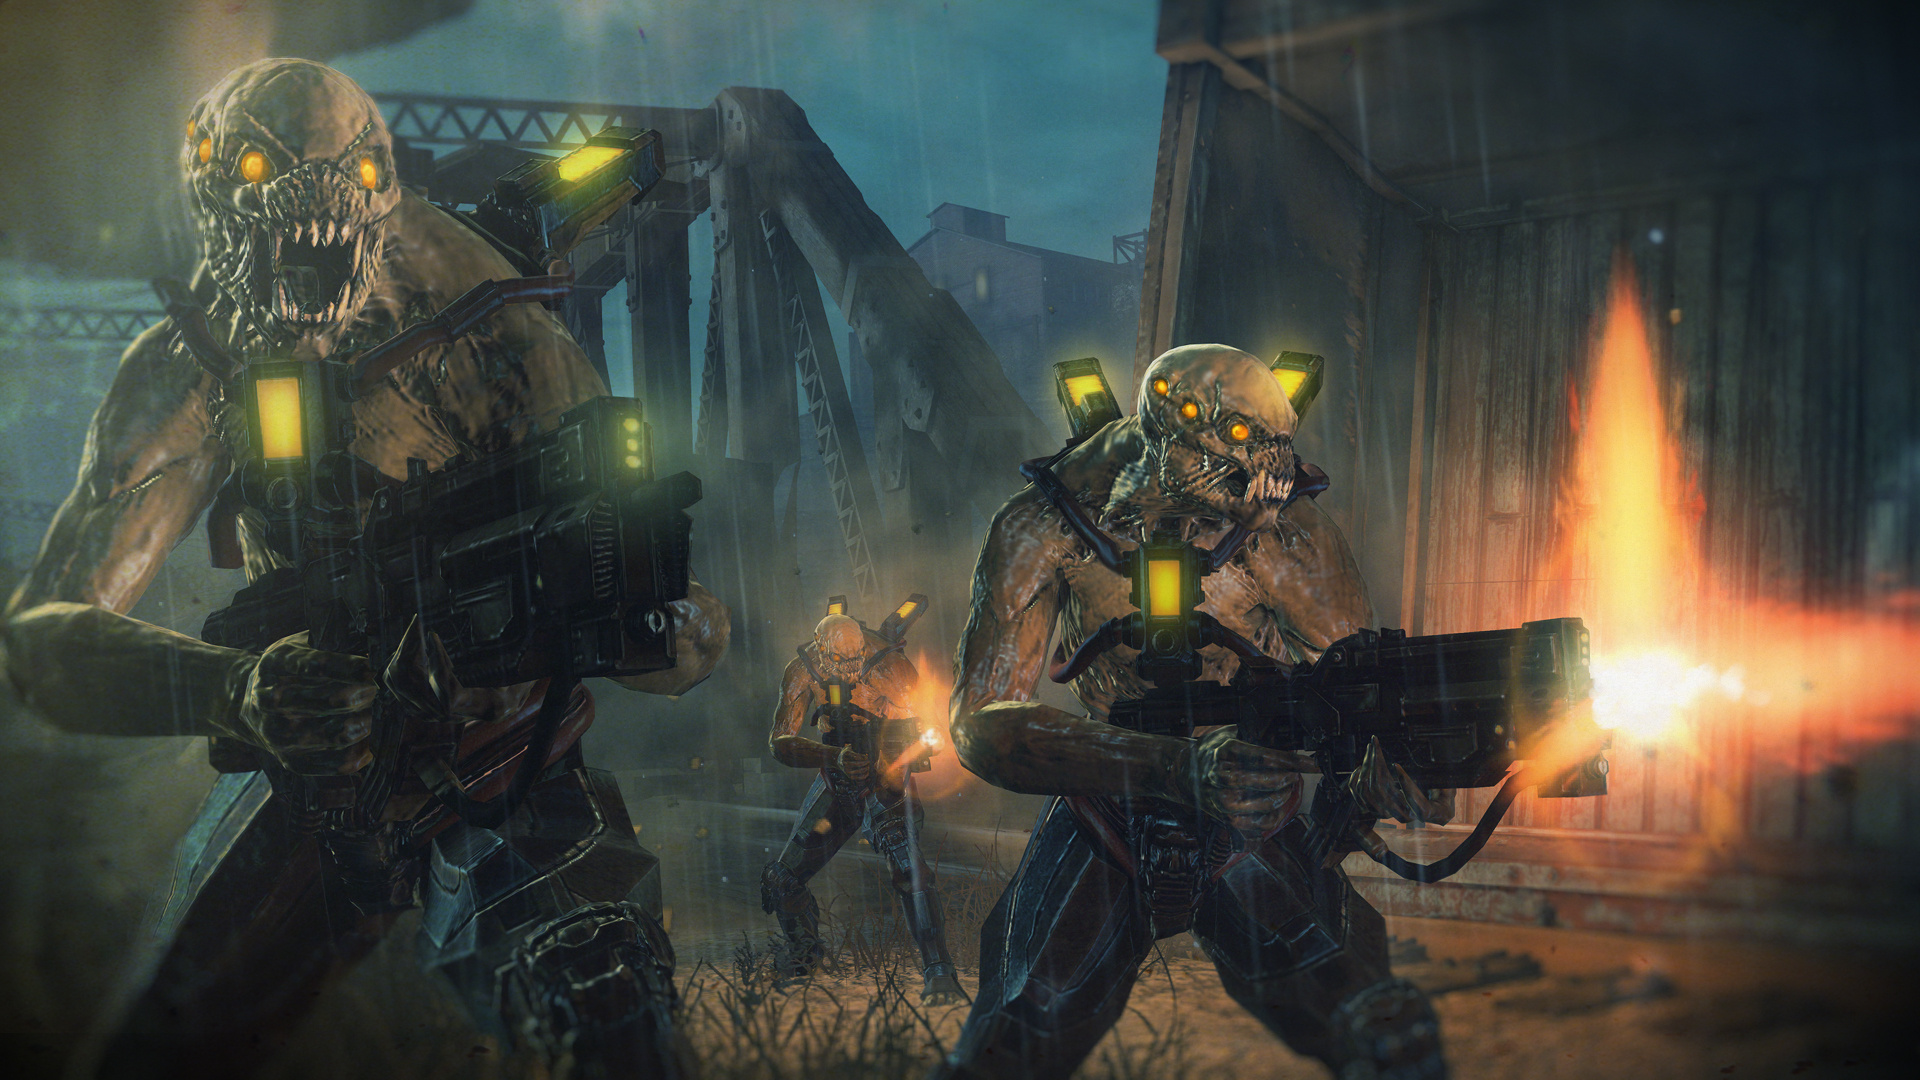
Navigation is an extremely important aspect of creating engaging and interesting game AI. Anyone who's witnessed an NPC walk tirelessly into walls and obstacles knows it can break the immersion very quickly. In order to create visually pleasing NPC navigation, a delicate balance between goal based path-finding, obstacle avoidance, and animation must be established. This is demonstrated in excellent fashion by Insomniac studios (creators of Spyro The Dragon, Ratchet and Clank and Resistance) in their recent titles released on the PS3 console. I recently had the privilege of watching Reddy Sambavaram's GDC talk (http://www.insomniacgames.com/navigation-gdc11/) detailing the navigation systems of their recent games and some techniques from their upcoming titles. With this new-found knowledge, I will provide a brief rundown of how Insomniac achieved such fluid character navigation in their recent titles (Particularly the Resistance series).

Navigation can be seen as a step by step process, so I will try to explain it as such.

Step 1: Path-finding

Finding the shortest, or most cost effective path between a series of checkpoints (called nodes) is a fairly simple process. First, a cost value is assigned to each node. This cost is usually representative of the distance or time it takes to travel to the node, however this may not always be the case. If desired, the cost could literally be a monetary value required to travel from node A to node B.

Once the cost of traveling from node to node has been assessed, the A* algorithm can be applied to determine the most cost effective path. This is without a doubt the easiest part of the path finding process. The hard part is selecting our nodes.

When you hear the word node, you may be tempted to think of a single coordinate in space. Most of the time this is not an incorrect assumption, however in a comprehensive 3D game engine, path nodes are usually represented as geometry. These bits of geometry are more commonly referred to as Navigation Meshes (Nav Meshes for short).

Image captured from Reddy Sambavaram's GDC presentation

Nav Meshes are convex 3D polygons which are used to represent the space that NPCs can traverse. In the path-finding algorithm, these are our nodes. Nav meshes can be (and have historically been) generated in different ways. In Resistance 1 and 2, the nav meshes were laid out by level designers in Maya. Eventually this system was overhauled in favor of an automated nav mesh generator in the team's world editor. Insomniac's process of automated nav mesh generation uses voxels (3D volumetric pixels) to approximate the traversable area of the game world. This is done in a step by step process as follows:

Image captured from Reddy Sambavaram's GDC presentation

Once the nav mesh has been generated, and the A* algorithm applied we can move on to:

Step 2: Steering

Steering NPCs in a realistic way is mostly a combination of obstacle avoidance, and spline interpolation. These techniques ensure that enemies do not walk into objects, or move in boring linear paths. For simple navigation around corners, Insomniac uses the "string pull" method to smooth the AI's turning.

Image captured from Reddy Sambavaram's GDC presentation

For more complex sets of obstacles however, this technique is not enough

In scenarios with multiple small obstacles, "escape tangents" are computed for each obstacle. These are simply possible vectors which allow the NPC to avoid contact with the obstacle.

Image captured from Reddy Sambavaram's GDC presentation

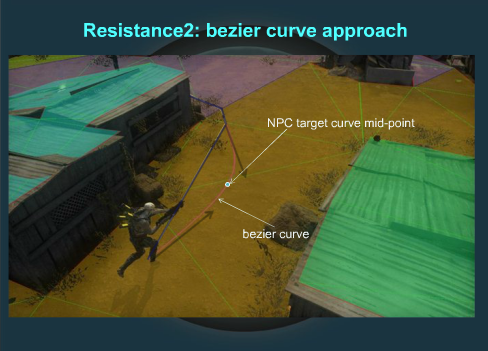
Simply having NPCs move in straight lines while avoiding obstacles is not enough. These escape tangents are used as the basis of bezier curves which will produce a fluid, more realistc path of motion.

Ok, now we have NPC's that can avoid obstacles, and move along a spline. What else is left?

Step 3: Animation

In order for the AI to traverse a dynamic environment in a believable fashion, each NPC must animate differently according to obstacles/interactables in the game world. The most notable example is when the AI must traverse some sort of height difference, whether it be by climbing, jumping up, or jumping down. Insomniac solves this issue by using a system called "custom links". Custom links are like nodes, except they allow the designer to specify what animation the NPC will play upon traversal, and even allow the NPCs to modify the cost of individual nodes (for example if one NPC climbs through a window, the link's cost will increase while he does so). This technology allows for highly dynamic AI that can traverse the level in interesting ways.
These 3 main components when done right, come together to create very believable AI navigation in games. Insomniac does an exemplary job tying these components together, and with very impressive performance to boot. If you'd like to learn more about Insomniac's navigation ingenuity, check out Reddy Sambavaram's original GDC Talk (http://www.insomniacgames.com/navigation-gdc11/).

Monday, 25 November 2013

Blog Quest 1: Emotional Contagion (Round 2)


Similarly to my previous entry (http://jamesmakesgames.blogspot.ca/2013/10/blog-quest-1-emotional-contagion.html), this post is about a game that has impacted me emotionally and inspired me to become a game developer. This time, that game is the Metal Gear series. The franchise's genre-defining stealth gameplay, deep plot, and Hollywood cinematic production have made it into a household name and one of my favorite games of all time.


First of all, let's talk gameplay.

Metal Gear Solid was the first game I played (and know of) with a cover system. Unlike this mechanic's use in most modern third person shooters, the cover system was only useful for stealth (as Snake was unable to attack from cover). This feature was later improved in Metal Gear Solid 2: Sons of Liberty, allowing Snake to peek around corners and fire weapons from cover. This cover system undoubtedly served as inspiration for the cover system in Gears of War, which would eventually be imitated by the majority of subsequent third person shooter titles.
Before Marcus Fenix, there was Solid Snake.

As one of the earliest pioneers in the stealth genre, Metal Gear Solid was the innovator of many mechanics which have become standard stealth game staples.


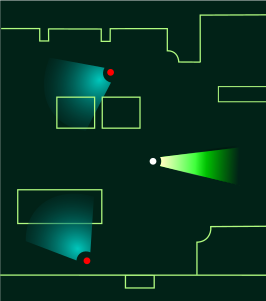
One such mechanic was the radar system used in MGS1 and MGS2. This game (along with Eidos' Commandos: Behind Enemy Lines) was one of the first to use this type of GUI to display the field of view of enemy NPCs. This would later become very popular in other stealth titles.


My personal favorite mechanic to be popularized by the series is stealth take-downs. These close quarters surprise attacks have evolved with each game, giving Snake more options to dispose of his foes lethally or non-lethally.
That's enough talk about mechanics, time to talk about the feels.

The series has featured a number of different protagonists, the primary one being Solid Snake. Over the years Snake has matured into a complex character with a deep inner conflict. In Metal Gear Solid 4, Snake is told he has less than a year to live due to an accelerated aging condition related to his mysterious origin. The theme of certain death is explored throughout the game as Snake embarks on a suicide mission to destroy yet another military super weapon.

Aside from MGS4's particularly morbid tone, each game explores themes of patriotism, loyalty, compassion, and humanity. While the games do at times feel like movies, this is not a bad thing as the production quality of the in engine cut-scenes have always been top notch for the time. Below is one of MGS4's exceptionally choreographed fight sequences.


Fortunately these cut-scenes are not just about flashy combat and explosions. They are often filled with emotion and presented in experimental/interactive ways. MGS4 in particular has scenarios where gameplay and cut-scenes happen simultaneously via split screen. This seems confusing at first, but the tension created by seeing multiple characters' points of view is truly exhilarating


This type of scene exemplifies the innovation and high quality presentation the Metal Gear Solid Series has become known for. 

Final Thought: If you haven't played this series before, I'm sorry for possibly spoiling it for you. That being said, you should still play it. If you're a long time fan of the series like me, I'm sure you can't wait to get your hands on Metal Gear Solid 5: Phantom Pain. So far the title looks to be even more innovative and well presented than the previous games.

Saturday, 16 November 2013

Blog Quest 2: Design your game item

Have you ever found yourself wishing for non-existent items in your favorite games?


I recently played and beat Outlast, a horror game that pits you in an asylum gone awry with nothing but a camcorder. There were many times when the scared little girl in me was practically praying for a weapon (hell even like, a shovel would have been okay). But this isn't about Outlast, maybe I'll do that one next blog.

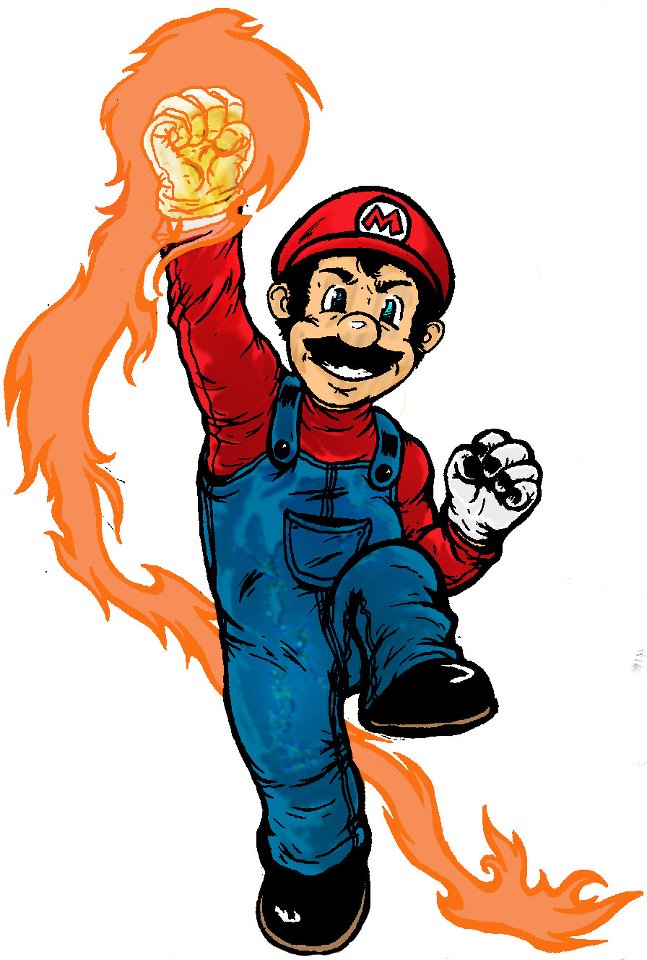
Allow me to introduce, Ryu's Bandana! The latest addition to Mario's arsenal. 

Art by Michael Musco

What exactly does it do? (Besides turning mario into a total badass). Mario learns the power of Shotokan Karate, mastering 3 powerful moves:


Shoryuken (Forward, Down, Down + Forward + Sprint): This rising dragon punch stays true to it's name, giving Mario the ability to soar upward with a fiery uppercut. The move does 3 points of damage (a classic headstomp does 1 point), and makes Mario invulnerable to attacks during it's 3 frames of animation startup. Any blocks Mario's fist makes contact with will explode, releasing any coins or power ups contained within.

The only downside to this attack is it's recovery period. As Mario descends from his Shoryuken, he is left completely vulnerable to physical attacks and projectiles. That's right kids, just like in Street Fighter.

This attack is particularly useful against bosses as the move's invincibility can be used to avoid their attacks, and normal enemies tend to die in one hit anyway.


Hadouken (Quarter Circle Forward + Sprint): Using the power of the "wave motion fist" Mario channels his inner ki into a ball of red hot fire. Sure he can already eat a fire flower and toss puny little tennis balls of fire at unsuspecting goombas, but believe me when I say this attack is far more powerful. The fireball does not disappear when it makes contact with enemies. It also does not bounce on the ground like the fire flower shot, moving in a straight line until it reaches the end of the screen. The projectile does 1 point of damage.

The major disadvantage to this attack is it's long start up time of 25 frames. Mario needs to be relatively safe in order to fire a Hadouken, or he risks being hit out of the move entirely.

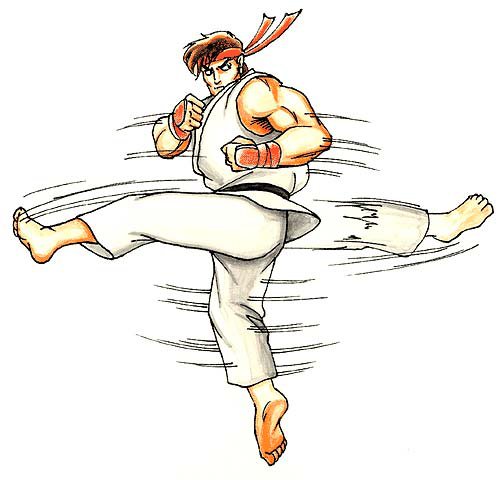
Just pretend it's Mario. I do not own this art.

Tatsumaki Senpuu Kyaku (Quarter Circle Back + Sprint): Mario unleashes a furious tornado kick, traveling forward about 1/4 screen distance. If this move is executed mid air, Mario's gravity value is decreased by half causing him to float. This means the move can be used to reach high places (executed before apex of jump) or to glide for long distances (executed after apex of jump). This is not to say the move has no merit as a physical attack...

The Tatsu (Street Fighter shorthand) allows Mario to travel through projectiles while advancing with an attack. The kick hits 3 times, each dealing 1 point of damage.

Unfortunately this move is not completely fail safe, Mario's raised leg becomes the attack hitbox, but his head and upper torso remain vulnerable to physical attacks. That being said, the move is great for enhancing Mario's mobility and gaining the upper hand on pesky ranged enemies.


Final Thought:

Due to it's indisputable power, Ryu's bandana would have to be a relatively rare drop. A strong player may likely be able to hold onto it for the entire game.


Wednesday, 16 October 2013

Blog Quest 1: Emotional Contagion

For the purposes of this blog, I have been asked to talk about a game that has impacted me emotionally and influenced me creatively. While hundreds of games have had these effects on me, few have had as significant an impact as Chrono Trigger and it's sequel Chrono Cross (let's forget about "Radical Dreamers"). Thanks to the series' strong character design, non-linear storytelling, and charming soundtrack it has become one of the most adored JRPGs of all time among fans of the genre.

If you haven't played the game and wish to do so, I suggest you tread lightly. There may be SPOILERS ahead.

So... what makes this game so great?


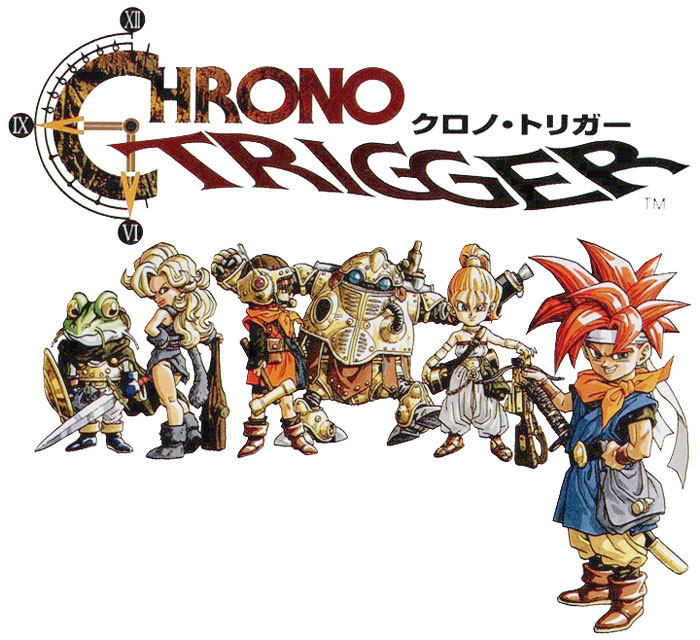
Let's start with the characters, designed by none other than Akira Toriyama of Dragon Ball Z fame.

The main characters of these games are always silent, giving the player the freedom to impose their own personality. The game's many other protagonists/party members are colorful and extremely varied, each with their own instantly recognizable silhouette. Every one of these heroes has a comprehensive back-story that is revealed in a timely and dramatic fashion. In some cases these back stories can be gut wrenching, and often playable. Check out the video below to see exactly what I'm talking about.


In this particular scene, the player is confronted with a situation where they can save a character's mother from a tragic accident that occurred in the past. Not only does this scene serve as a powerful flashback to tell the story of the mother's injury, but it gives the player a chance to remedy the situation (thanks to the magic of time travel). These types of scenarios occur quite often of the course of the game, and give the player's own actions a tangible effect on the outcome of the story. 

The game's plot contains multiple subplots and side-quests, the outcomes of which will dictate the game's ending. Not bad for a game originally released in 1995! This was certainly the first game I played that offered multiple endings, especially ones influenced by decisions made throughout the game as opposed to right at the end (I'm looking at you Deus Ex).


When it comes to non-linear narrative, Chrono Trigger holds up better than many new games in my opinion. For starters, the game takes place in multiple different time periods, which can be traversed at will. It also boasts 13 different endings. Far too often in my experience, games will force an ending defining decision just before the end of the game. In the case of the aforementioned Deus Ex (a game I love equally as much as this one), the decision was as simple as choosing between 3 buttons to press (corresponding to each ending), 5 minutes before then game's conclusion. In Chrono Trigger this is not the case. The game can be ended in multiple ways at different points in the game, with different positive and negative outcomes. The minor decisions made throughout the game also have effects on minor aspects of the ending, providing resolutions to each of the characters' own personal struggles. The story is generally filled with emotion, giving rich character development to even the game's Robot character (simply named Robo).

Chrono Cross is a little different. The plot follows a young man named Serge, who is unknowingly sent to an alternate dimension in which he (yes Serge) drowned as a child. When he encounters his loved ones in this dimension, none of them seem to know him although they acknowledge his resemblance to the boy they once knew. Worst of all, when Serge attempts to claim his identity, no one will believe him since they all saw him die. The game does a great job making the player feel lost and alone in this strange alternate universe. 

For me, these games are far more emotional than modern titles like Heavy Rain. One of the most important reasons for this is the masterful soundtrack composed by Yasunori Mitsuda and Nobuo Uematsu. Each piece is filled with emotion and perfectly describes the character or situation it is bound to. Just listen to this number and try not to shed a tear. 


Okay, so maybe it didn't make you cry but it's hard not to hear beauty in this piece. Chrono Trigger had arguably some of the greatest music ever composed for the SNES. Likewise, Chrono Cross raised the musical bar with the increase in horsepower given by the Sony Playstation. The console's CD quality audio capabilities gave the composers the freedom to create an even more dynamic, organic sounding mix (thanks to the presence of real instruments). The difference is pretty drastic, as can be heard in the following clip.


The soundtracks for both of these games contain some of the most beautiful songs composed in video games.

Overall the Chrono series is one that is very near to my heart. It has provided me with countless hours of enjoyment, but also inspired me in more ways than one. Akira Toriyama's unique and intricate character design is something I admire greatly and would love to learn to replicate one day. I can also say with confidence that the music from these games has had a very real impact on my musical taste and myself as a musician. Aside from this, the game's story and the overall experience is one I will cherish for years to come.


Sunday, 6 October 2013

Phyre Starter


For the past few weeks, I've been working extensively with Sony Computer Entertainment's Phyre Engine. This is the same engine that powers Namco Bandai's Dark Souls, as well as thatgamecompany's Journey among many others.


So far, I can't complain. The engine is free to use, gives the developer source level access and supports multiple platforms (PS3,  PS4, Vita, PC). To top it all off, it sports a very powerful editor tool with full scripting functionality. The editor is completely optional, and if you so choose you can ignore all additional features and use Phyre as a simple rendering engine.


The editor is very easy to use, with the standard array of property sheets, script editors, and object hierarchies you would come to expect from a tool like Unity or UDK. Game logic can be written in scripts through the editor, or implemented through C++ code at the source level.


The code above is the heart of your typical Phyre application header. The virtual functions marked "Phyre Framework overrides" encapsulate all of the top level functions of your game application (namely things like initialization, input handling, updating and drawing). The functions below the "PIEditEventHandler Implementation" comment can be called directly by the scripts attached to game components constructed in the Phyre Level Editor.

Speaking of which, Phyre follows a component-based model. This means that the game entities you construct in the editor are built up of multiple components. These components could be anything from your art assets (animations, textures etc) to character controllers, triggers etc. Below is a list of the components that make up the little girl shown in the screen shot above.


Not only is this an elegant way to organize data in our editor (good for us humans), but this is also very efficient for our game at run-time. By storing our data components in common sets, as opposed to an object oriented approach, we can reduce cache latency and thus lose fewer CPU cycles. That way we can use valuable time for things that matter (gameplay, graphics, gibs).

With it's wide variety of features and tools, as well as easy portability to multiple platforms it's a wonder that more people are not using this engine. My team and I are very excited to make our next game using this tool, and are looking forward to seeing what we can produce.

Friday, 12 April 2013

Lighting and Shaders Episode 2: Implementation

How we went from this:


To this:


The short answer: By putting the task of making an awesome game above all others (including blogging).

The long answer: Shaders(!!!!!), new art assets, completely revamped game engine and systems, original soundtrack and sound effects


Let's start with the shaders


Cel Shading with Black Outlines + Rim Lighting
In my previous blog (Lighting and Shaders Episode 1), we talked about a few effects I planned to add to our game (GTFO: The Double Dungeon Debacle). One of these effects was cel shading. Here you can see my implementation of the effect on our old prototype character model as well as our new and improved model.

The trick to this algorithm is very simple. To achieve the cartoon shading effect, we calculate the intensity of the light by taking the dot product of the incident light and the normal at each vertex. We then use a piece-wise function to compute the final light color based on specific ranges of light intensity. To generate the black outlines, we simply draw the model again but this time we translate each vertex by its corresponding normal (normalized then multiplied by some scalar), and force the color to black in the fragment shader. We also invert OpenGL's back-face culling before drawing the black mesh.


Tangent Space Normal Mapping

After looking at our prototype, we realized our environments look pretty flat. The walls and ground lacked depth and had no lighting applied to them whatsoever. To remedy this, we added normal maps to all of our environment assets. We placed our light source relative to the main character's position to create a sort of "halo" effect around the character. Since we use the same lighting model for the ground as well, the light appears consistent, and adds a ton of detail to the scene.


Particles

Our graphics programmer, Divakar Dev took on the task of completely revamping our game's particle system. In the prototype, we had basic 2D particle support, but no billboarding. We also had a few nasty memory problems, and game breaking glitches related to our half baked particle engine. Now, we use geometry shaders to render particles which takes care of billboarding automatically. Divakar also fixed most of the memory and performance issues related to the particles and added some really nice looking effects to make our game's visuals pop.

Still to come: Shadows, FXAA, SSAO, Sexy new GUI


All new art assets


Our art team (Bobby Muir and Vincent Marchesano) worked painstakingly to create brand new models, textures, and animations to show off our game's new graphical capabilities. Bobby and Vincent iterated constantly, often re-doing entire animations for the sake of gameplay functionality and polish. Most characters have an average of about 5 animations.

Revamped game engine and systems

New and improved Level Editor. Grids, navgraphs and triggers oh my!

As lead programmer, the largest chunk of my time was spent coding our game engine. I would say 60% of the time I spent coding was invested into our level editor. This was the tool that allowed us to bring all of our assets together into a unified experience.

Our prototype editor contained only the basic functionality to place walls and monsters. After we ran our second pass on the game's code, much of the back end was scrapped. This was because of the transition to OpenGL's retained mode rendering. All of the basic building blocks of our prototype were using deprecated graphics code and strange proprietary math libraries. As a result I spent a large amount of time revising just about every aspect of the game's code, from the locomotion and animation systems, to collision detection and AI. The editor also received a plethora of upgrades including grids/gridsnap, dynamic navgraph creation,  intelligent spawn point creation, and basic switch and gate triggers.

I didn't spend all of my time working on tools however. The final stretch of development (of the current build) was mostly spent on gameplay improvements. I was finally able to implement melee combat (for our second lead protagonist, Shara), and I made countless changes and improvement to the game's controls and gameplay in general. My goal was to make movement feel as smooth as possible, and to create accessible yet deep combat.

My favorite new feature has to be see through walls (occlusion control)


Original soundtrack and effects

Not everyone knows this but, music is probably the only thing I love as much as video games (don't tell my girlfriend I said that). The current demo build of GTFO features an original track by yours truly. In this song (originally titled Halloween) I play guitar, bass, and keyboards (synth flute + drums).

Our sound producer Gianluca Leal produced/recorded a gargantuan amount of sounds, not all of which managed to make it into the game. But those that did continue to make me feel warm inside almost daily.

Conclusion

To close this blog, I'd like to say that I'm extremely proud of the work that my group and I have been able to produce. It would not have been possible without the dedication and hard work of everyone who contributed. This game has been our top priority since it's conception, and we will continue to try to make it into something great.

A final note to any professor's who may be reading/grading this submission *wink*

Our team is first and foremost dedicated to making great games, no questions asked. Not all of us have been keeping up with blogs, but that's because we've instead chosen to make a stellar product as opposed to writing about one. Please take this into consideration when you grade us!

Thanks for a great semester,

James Creavalle


Thursday, 17 January 2013

Lighting and Shaders Episode 1: Game Mockup

Another year, another school semester. And with that comes some new knowledge. This week I started learning about shaders, and how I can use them to make my games look nice. Shaders are small programs that run on a computer's GPU which augment or enhance the visual assets of a game. They are responsible for displaying (drawing) the game and can be used to achieve effects such as lighting, shadows, ambient occlusion, bloom, HDR etc. Finally (and most importantly) they do all of this at lightning speed.

Before I get down to the nitty gritty to start implementing this in my games, I've started with a few mockup designs for the effects I hope to achieve with shaders. The game I'll be working with is my team's current 3D prototype project "GTFO: The Double Dungeon Debacle". Below are some mockups I did in photoshop to simulate the look we're going for.

First let's have a look at our source image:

Nothing too exciting here... No lighting, flat shading, ugly particles, weak selection circle


Here's the first edit:

Changes:

- Added a radial light to the player
- Added cartoon cel shaded effect to the characters (painted on manually)
- Added a new fireball sprite with trailing particles, made a nicer selection circle
- Added dynamic shadows to characters
- UPDATE: Adjusted brightness and contrast


Second Edit: (My personal favourite)

- Started with first edit
- Added a bloom effect (using diffuse glow in photoshop)
- Increased saturation slightly to compensate for diffuse glow effect
- UPDATE: Adjusted brightness and contrast


Third Edit:

- Started with second edit
- Added a subtle film grain effect (would be optional or used in cutscenes)
- UPDATE: Adjusted brightness and contrast


Overall I think these mock-ups are a significant improvement to the look of the game and will be going forward with these visual goals in mind. Feel free to comment with any feedback.